This tutorial is the second post in our three part series on shape detection and analysis.
Last week we learned how to compute the center of a contour using OpenCV.
Today, we are going to leverage contour properties to actually label and identify shapes in an image, just like in the figure at the top of this post.
Looking for the source code to this post?
Jump right to the downloads section.
Jump right to the downloads section.
OpenCV shape detection
Before we get started with this tutorial, let’s quickly review our project structure:
As you can see, we have defined a pyimagesearch module. Inside this module we haveshapedetector.py which will store our implementation of the ShapeDetector class.
Finally, we have the detect_shapes.py driver script that we’ll use to load an image from disk, analyze it for shapes, and then perform shape detection and identification via theShapeDetector class.
Before we get started, make sure you have the imutils package installed on your system, a series of OpenCV convenience functions that we’ll be using later in this tutorial:
Defining our shape detector
The first step in building our shape detector is to write some code to encapsulate the shape identification logic.
Let’s go ahead and define our ShapeDetector . Open up the shapedetector.py file and insert the following code:
Line 4 starts the definition of our ShapeDetector class. We’ll skip the __init__ constructor here since nothing needs to be initialized.
We then have our detect method on Line 8 which requires only a single argument, c , the contour (i.e., outline) of the shape we are trying to identify.
In order to perform shape detection, we’ll be using contour approximation.
As the name suggests, contour approximation is an algorithm for reducing the number of points in a curve with a reduced set of points — thus the term approximation.
This algorithm is commonly known as the Ramer-Douglas-Peucker algorithm, or simply the split-and-merge algorithm.
Contour approximation is predicated on the assumption that a curve can be approximated by a series of short line segments. This leads to a resulting approximated curve that consists of a subset of points that were defined by the original cruve.
Contour approximation is actually already implemented in OpenCV via thecv2.approxPolyDP method.
In order to perform contour approximation, we first compute the perimeter of the contour (Line 11), followed by constructing the actual contour approximation (Line 12).
Common values for the second parameter to cv2.approxPolyDP are normally in the range of 1-5% of the original contour perimeter.
Note: Interested in a more in-depth look at contour approximation? Be sure to check out the PyImageSearch Gurus course where I discuss computer vision and image processing fundamentals such as contours and connected-component analysis in detail.
Given our approximated contour, we can move on to performing shape detection:
It’s important to understand that a contour consists of a list of vertices. We can check the number of entries in this list to determine the shape of an object.
For example, if the approximated contour has three vertices, then it must be a triangle (Lines 15 and 16).
If a contour has four vertices, then it must be either a square or a rectangle (Line 20). To determine which, we compute the aspect ratio of the shape, which is simply the width of the contour bounding box divided by the height (Lines 23 and 24). If the aspect ratio is ~1.0, then we are examining a square (since all sides have approximately equal length). Otherwise, the shape is a rectangle.
If a contour has five vertices, we can label it as a pentagon (Line 31 and 32).
Otherwise, by process of elimination (in context of this example, of course), we can make the assumption that the shape we are examining is a circle (Lines 35 and 36).
Finally, we return the identified shape to the calling method.
Shape detection with OpenCV
Now that our ShapeDetector class has been defined, let’s create the detect_shapes.py driver script:
We start off on Lines 2-5 by importing our required packages. Notice how we’re importing our implementation of the ShapeDetector class from the shapedetector sub-module ofpyimagesearch .
Lines 8-11 handle parsing our command line arguments. We only need a single switch here,--image , which is the path to where the image we want to process resides on disk.
Next up, let’s pre-process our image:
First, we load our image from disk on Line 15 and resize it on Line 16. We then keep track of the ratio of the old height to the new resized height on Line 17 — we’ll find out exactly why we do this later in the tutorial.
From there, Lines 21-23 handle converting the resized image to grayscale, smoothing it to reduce high frequency noise, and finally thresholding it to reveal the shapes in the image.
After thresholding, our image should look like this:
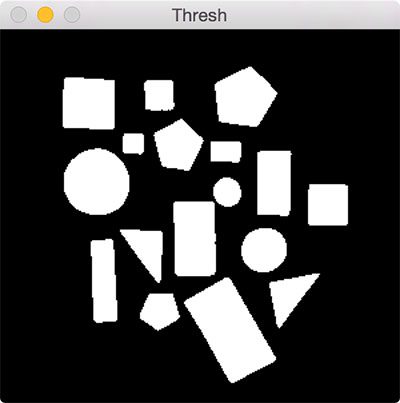
Figure 1: Thresholding reveals the shapes in our image.
Notice how our image has been binarized — the shapes appear as a white foregroundagainst a black background.
Lastly, we find contours in our binary image, handle grabbing the correct tuple value fromcv2.findContours based on our OpenCV version, and finally initialize our ShapeDetector (Lines 27-30).
The last step is to identify each of the contours:
On Line 33 we start looping over each of the individual contours. For each of them, we compute the center of the contour, followed by performing shape detection and labeling.
Since we are processing the contours extracted from the resized image (rather than the original image), we need to multiply the contours and center (x, y)-coordinates by our resizeratio (Lines 43-45). This will give us the correct (x, y)-coordinates for both the contours and centroid of the original image.
Lastly, we draw the contours and the labeled shape on our image (Lines 44-48), followed by displaying our results (Lines 51 and 52).
To see our shape detector in action, just execute the following command:
Figure 2: Performing shape detection with OpenCV.
As you can see from the animation above, our script loops over each of the shapes individually, performs shape detection on each one, and then draws the name of the shape on the object.
Summary
In today’s post blog, we learned how to perform shape detection with OpenCV and Python.
To accomplish this, we leveraged contour approximation, the process of reducing the number of points on a curve to a more simple approximated version.
Then, based on this contour approximation, we examined the number of vertices each shape has. Given the vertex count, we were able to accurately label each of the shapes.
This lesson is part of a three part series on shape detection and analysis. Last week we covered how to compute the center of a contour. Today we covered shape detection with OpenCV. And next week we’ll discuss how to label the actual color of a shape using color channel statistics.


Tidak ada komentar:
Posting Komentar